
How to Install: 2020 Toyota Supra Pre-cut Tail Light Face Tint Overlays
If you have purchased the 2020 Toyota Supra Pre-Cut Tail Light Face Tint Overlays and you don't know where to start. This is a specific guide just for you, especially because this specific overlay is created with a new and different material than most of our other products which is going to make the install process easier, and finished product look even better. Finding a way to tint your Supra Tail Lights at home without being a professional may be hard, but with this product specifically designed for the face of your tail light, anyone can tint them, even if you're a beginner. With a little bit of patience and the right tools that we have here on our site, such as our Pro Felt Squeegee you can change the entire look of your rear end yourself in under 30 minutes. Even better you can add another product to this overlay to give your rear end an even more aggressive look which will be listed at the end of this How To.
Want Your Install to Go Well, Read This First
First and foremost is the most important part of any install. This step will be the determining factor in whether or not your install goes well or not. This step is prep work, without prep you risk debris and contaminates getting stuck under the tint material becoming near impossible to remove and thus ruining the overall finish. In most cases a surface that is not clean will also result in adhesion issues, meaning the product will have trouble sticking and you will face lifting problems or the product might not be able to be installed at all if the surface is to dirty.
How Much and How Clean You Ask?
Let's break it down, cleaning should consist of removal of any waxes, dirt and or debris on the surface. For the cleaning process a clay bar is highly recommended: CLEANING PREP SPRAY & CLAY BAR's SOLD HERE). If you don't have prep spray, 70% isopropyl alcohol can be used to wipe the surface clean after heavy debris is removed from the surface. Wipe the surface dry with a clean micro fiber towel/rag. Now before you just jump right into it, you need to ask yourself, am I installing this product under the right conditions?
Wait What Conditions?
Before you begin installation of any vinyl overlays please make sure you are working in the right conditions, you should never install vinyl in direct sunlight, never apply vinyl in temperatures that are neither too hot nor too cold. Our in-house expert installers say the optimum temperature for installing vinyl is between 65 and 72 degrees (F). Vinyl can be installed in temperatures as low as 65 degrees (F), and up to 90 degrees (F). Vinyl has a more difficult time conforming and staying in place in colder temperatures though, which is why we recommend waiting until temperatures warm up or install in a temperature controlled environment. If you want the best end result, give yourself the best chance of success. It may sound weird but people wait to install vinyl products until warmer temperatures arrive all the time. Be patient, the end result will be worth it.
What Makes This Install Different?
Other than the very important things you may have missed if you skipped ahead to this part, which we highly recommend going back and reading if you don't want your install to be bad. This product is a DRY INSTALL product. Meaning you DO NOT USE ANY WATER on the surface when applying the tint. It is a simple peel off the backing paper and stick to the surface product. Using water on the surface to install this product will not make this installation easier, it will actually be very counter productive, as this specific material was made to act very similarly to automotive wrap vinyl. Unlike sticker vinyl, and standard tint film products that typically requires water for a wet install. As stated above, this product is a DRY Install. This is a new material that is being specifically used for this select pre-cut overlay.
Not Wet Install
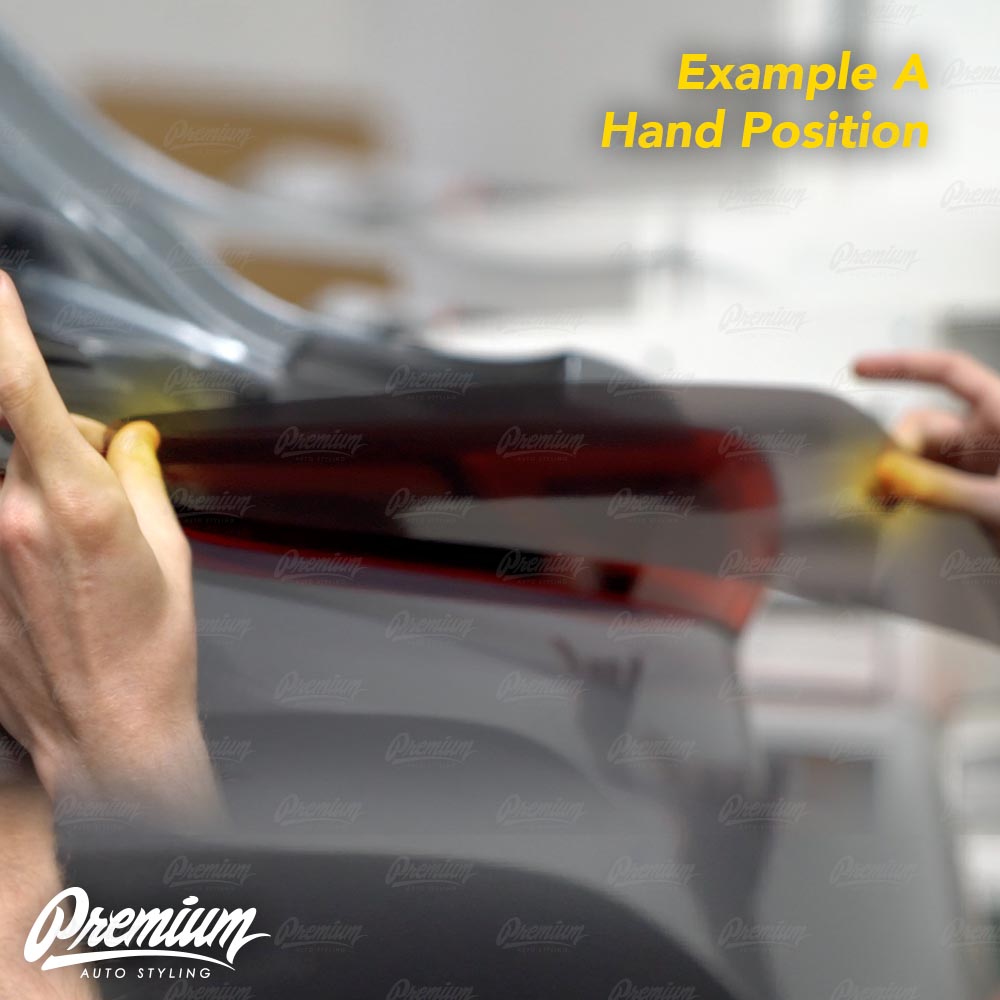
Now let's jump into it, after making sure your tail light is clear of debris and any moisture, remember this is a dry install not a wet install, Peel the overlay from the backing paper, hold the overlay by the inner corner that faces the trunk and the upper top corner on the opposite side shown in (Example A). This hand positioning will help with your placement.
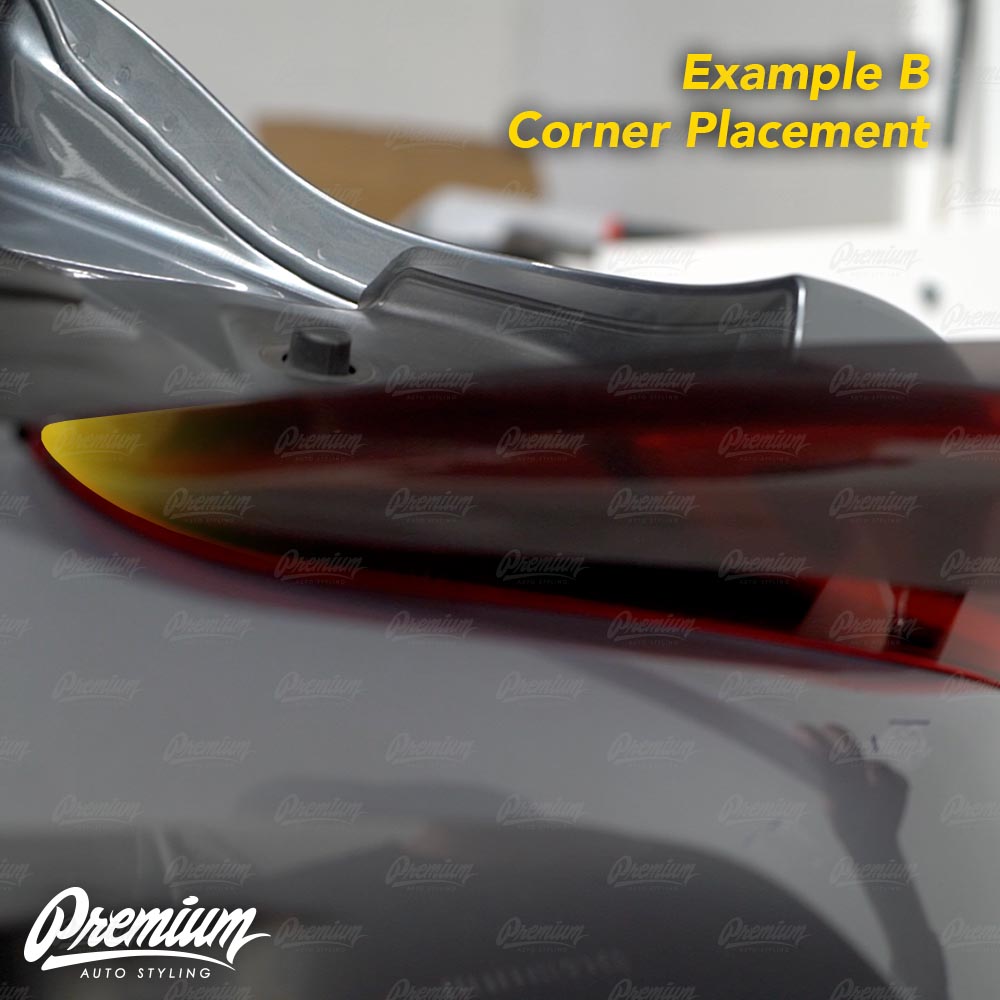
As shown in (Example B) start by placing the inner corner on the tail light while being careful not to let the entire face of the overlay stick to the tail light just yet.
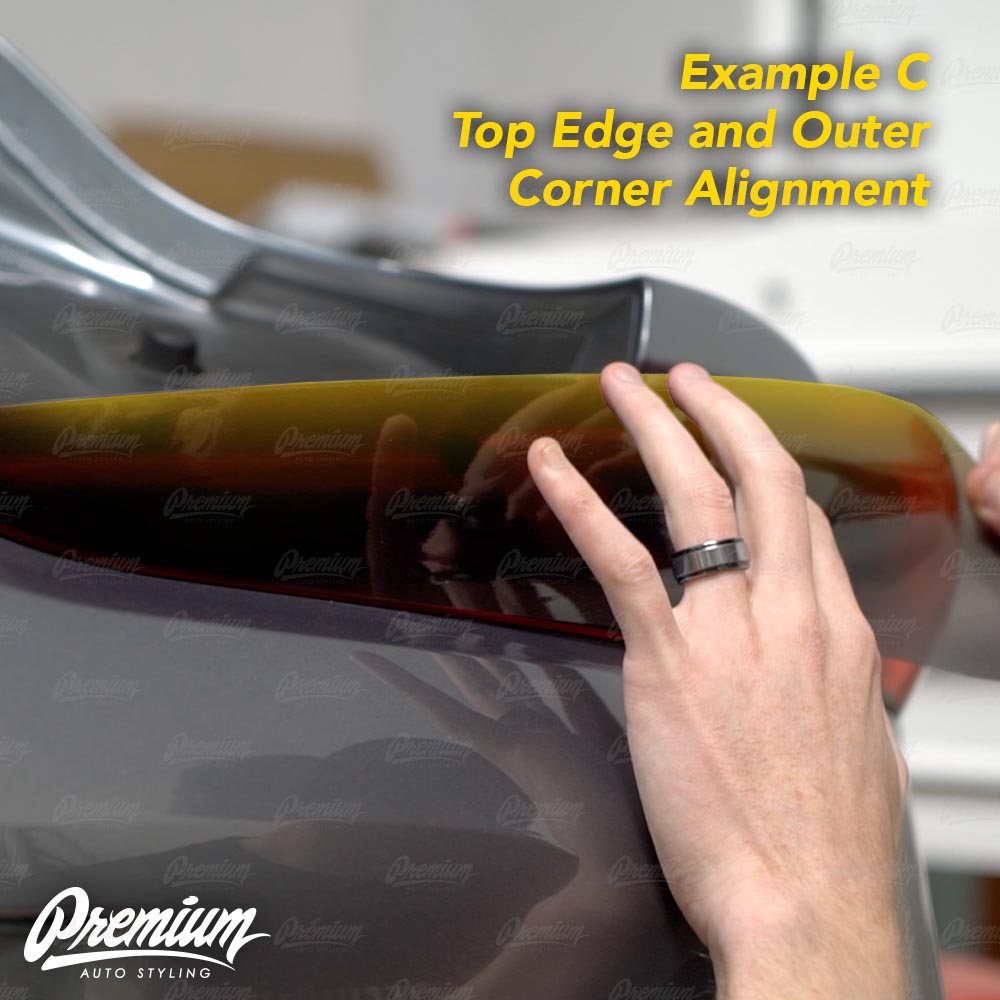
Then without pulling or causing any tension on the material, simply keeping the material taught, line up the top edge of the overlay to the top edge of the tail light face up until the top right corner your other hand is holding as shown in (Example C).
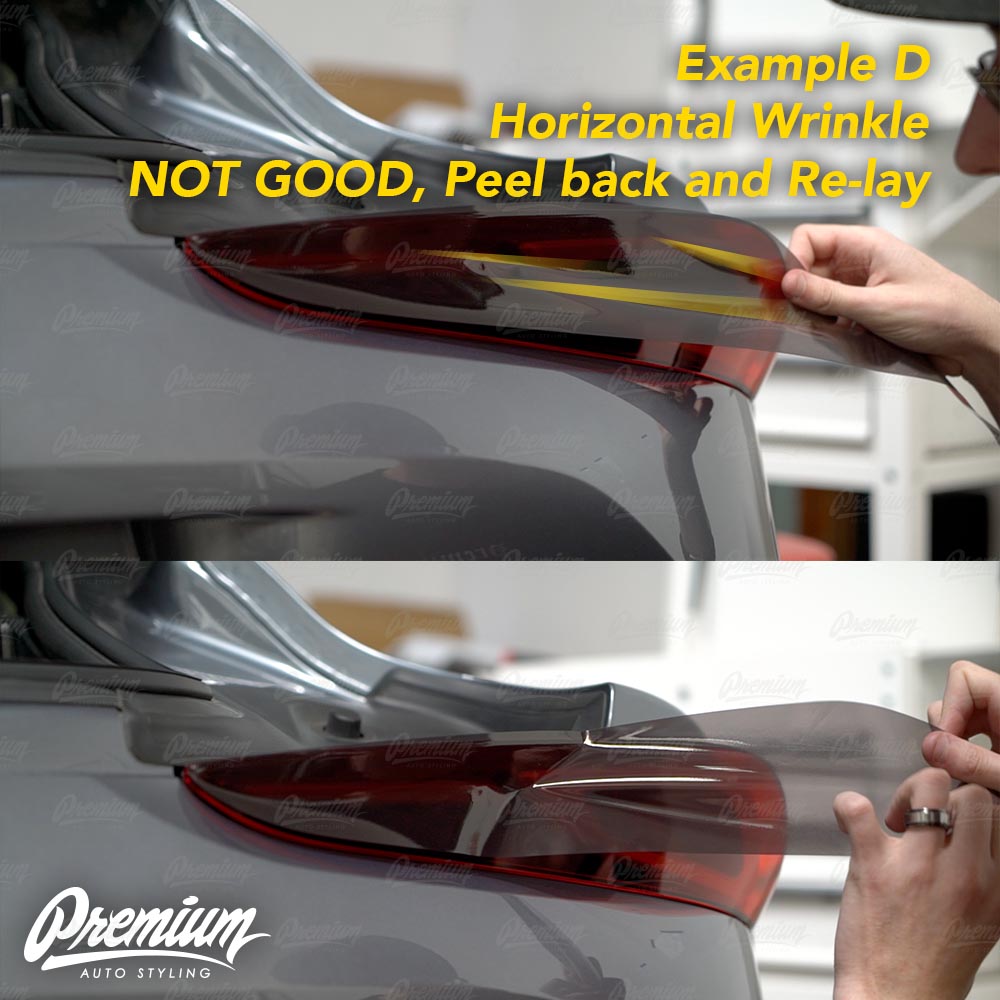
If you end up with a horizontal wrinkle on the face of the overlay such as the one shown in (Example D) simply pull that section back up and re-lay it again without tension to avoid getting that wrinkle again.
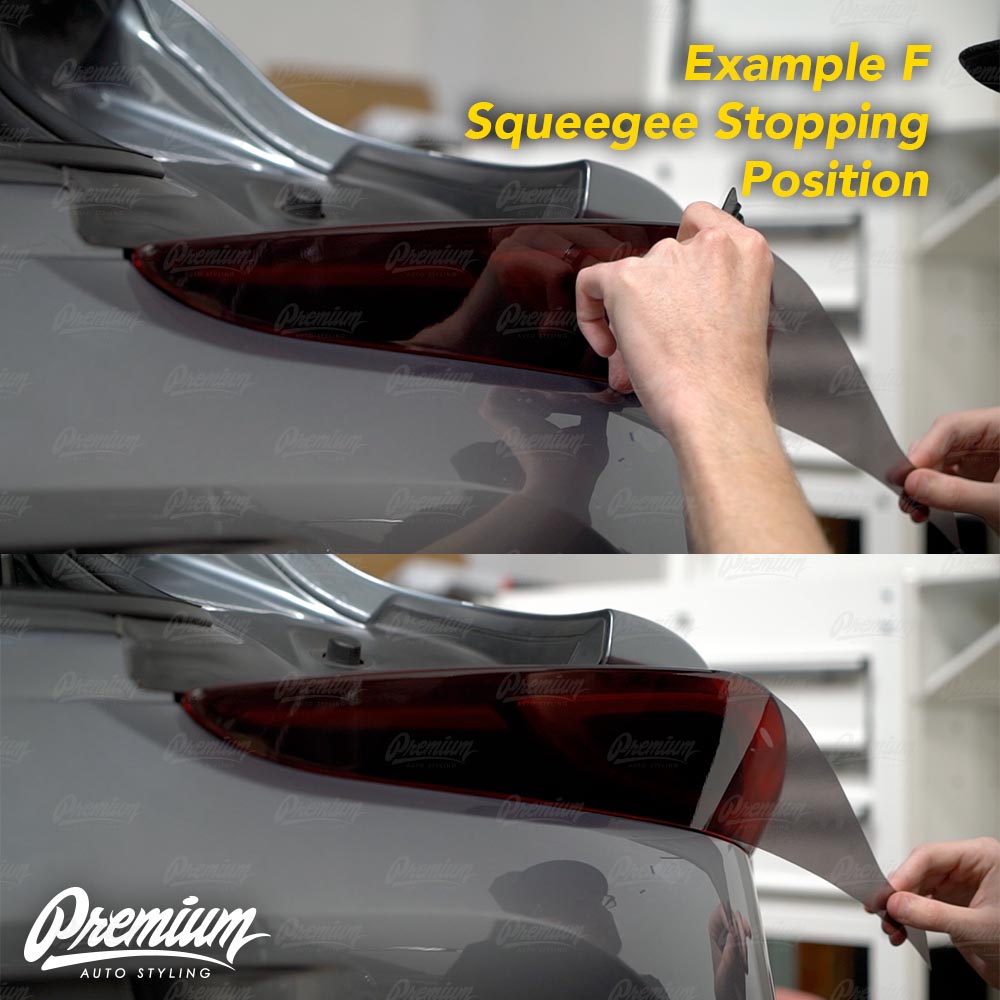
Once the top edge, inner and top outer corner is aligned correctly without any tension, As Shown in (Example E) squeegee down the face of the overlay starting from the inner corner moving towards the outer side of the tail light. Stop when you get to the area shown in (Example F).

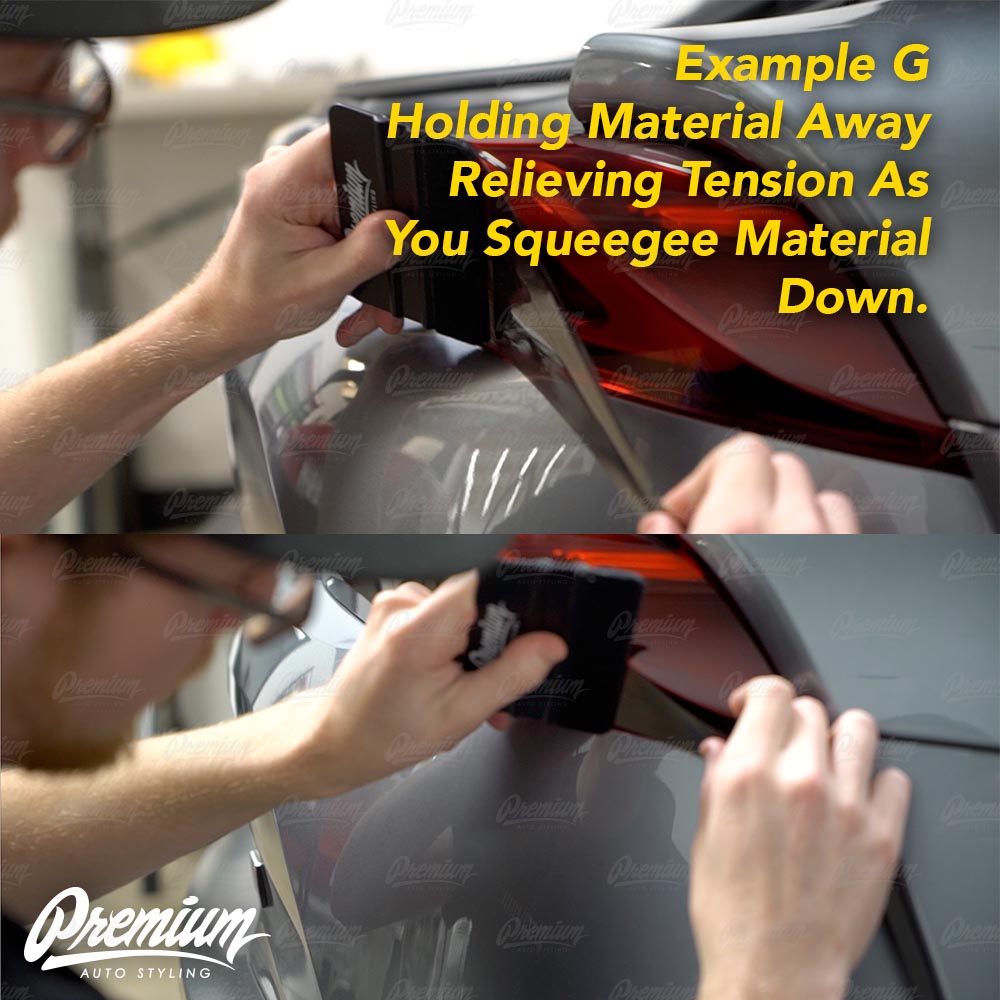
Now shift your focus to the side portion of the tail light, position your squeegee vertically as show in (Example G) while holding the remaining material away from the tail light, in one motion gradually lay the material down onto the tail light as you are squeegeeing it down in one motion.
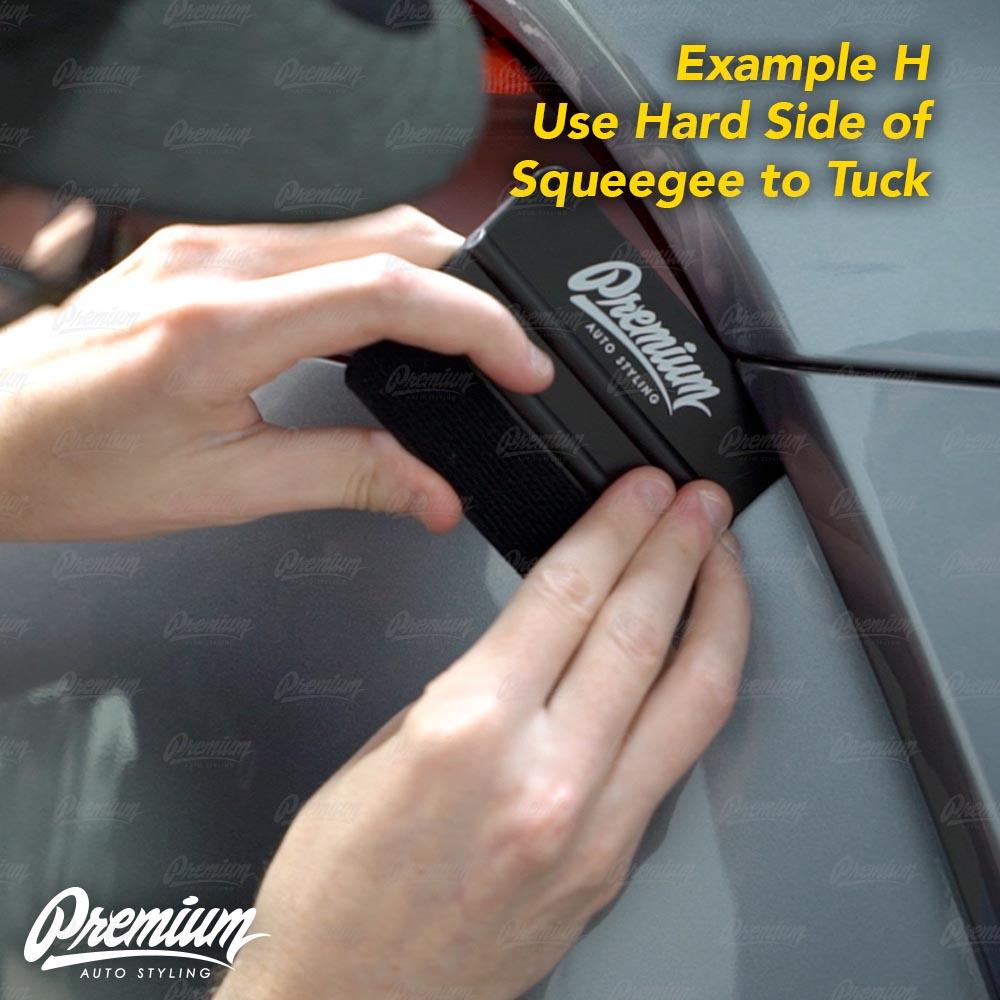
Switch to the hard side of your squeegee as shown in (Example H) tuck the remaining portion of the overlay into the crevasse between the tail light and rear quarter panel to achieve full coverage.
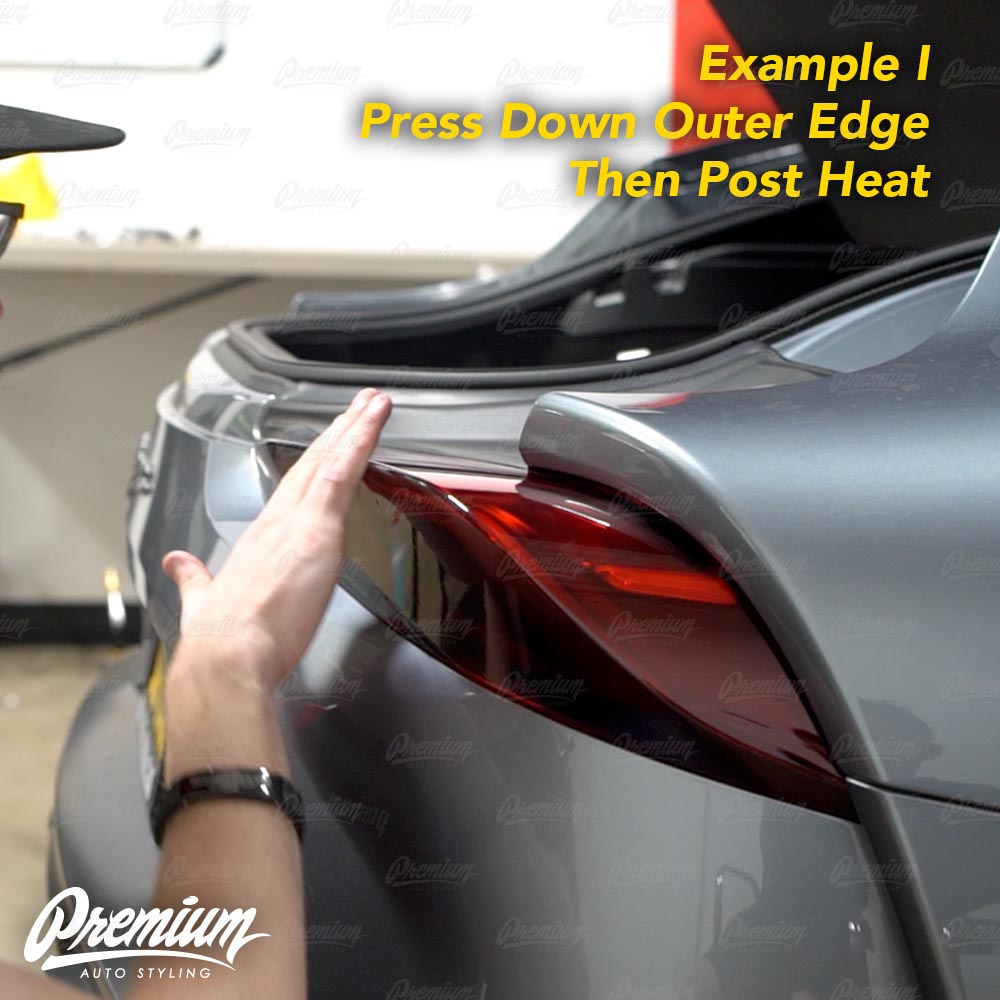
With your finger lay the outer edges of the overlay conforming nicely over the curved edge. (Example I).
Go back over the entire product with your squeegee to make sure there is no remaining air underneath the material. Finish by post heating the material with a heat gun or by leaving the vehicle outside on a warm sunny day for a couple of hours. This is done to finish the adhering process, and help conform any beveled edges. Once this is done your install is complete.
Now if you want an even more aggressive look for your rear end, we recommend combining this product with our Tail Light Deck Black Out Overlay in Gloss Black - or - Carbon Fiber.
Quick Additional Note, If you purchase the tail light face tint product as well as the Tail Light Deck Product, Install the Tail Light Face Overlay FIRST. Then install the Tail Light Deck Overlay SECOND.
Want to be walked through step by step where you can follow along, check out our install video below.