
Have questions?
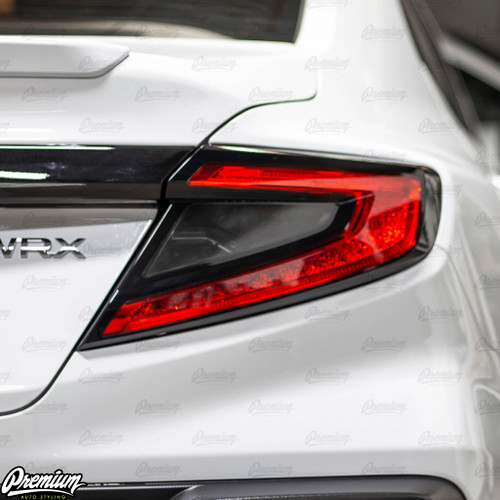
Stylize your WRX with our Inner Tail Light Tint Overlay. We know a lot of people think the WRX tail lights look like a vehicle from another brand. This product is applied over the turn signal + reverse lights to give your tail lights a darker appearance and gives them a unique style. We love this overlay for the ease of install and the change it brings to your WRX.
Premium Auto Styling Overlays are precision cut by our computers using Premium Automotive Grade Films. Unlike other companies, Premium Auto Styling Overlays are designed and produced in the USA in our own facility. We design & fit all of our products to ensure you the best fitment & results. Don't pass up this item to stylize your vehicle!
Tools Needed:
For Best results we recommend cleaning the surface that you'll be applying our overlays. Cleaning consists of removal of any waxes, dirt and or debris. For the cleaning process a clay bar is highly recommended: CLEANING PREP SPRAY & CLAY BAR's SOLD HERE).
Before you begin installation of any vinyl overlays please make sure you are working in the right conditions, you should never install vinyl in direct sunlight, never apply vinyl in temperatures that are neither too hot nor too cold. Our in-house expert installers say the optimum temperature for installing vinyl is between 65 and 80 degrees (F). Vinyl can be installed as low as 50 degrees (F), and up to 90 degrees (F).
To begin, you first want to spray the adhesive side of the vinyl with a fine mist of surface lube (less is better) and then position the vinyl into place on your vehicle. Use a squeegee and start from the center and begin pushing the air from beneath the overlay toward the edges - you may need a heat gun to help conform the material to aggressive bends and or corners.
TRIMMING, some overlays are intentionally designed slightly oversized for the ease of application, in this case minor trimming may be required.
Once you've completed the install we recommend that you leave your car in the sun for up to 30 minutes just to let everything dry, if you would like you can use a heat gun to speed up the drying process.
• Includes driver and passenger side overlays (2 piece kit)
• Adhesive backed film for easy installation and removal.
• Maintenance free & car wash safe.
• Can be removed without any damage to surface.
• 2-5 year life expectancy.
• Honeycomb Medium Smoke Tint
This install is a 1 out 5 in Difficulty.
Difficulty Rating of 1 is used for overlays that are easy for everyone including first time DIYers. (PIECE OF CAKE)

Interested in a custom color or finish for this product. Contact our team at orders@premiumautostyling.com and we can look into your request before you place your order.