
Have questions?
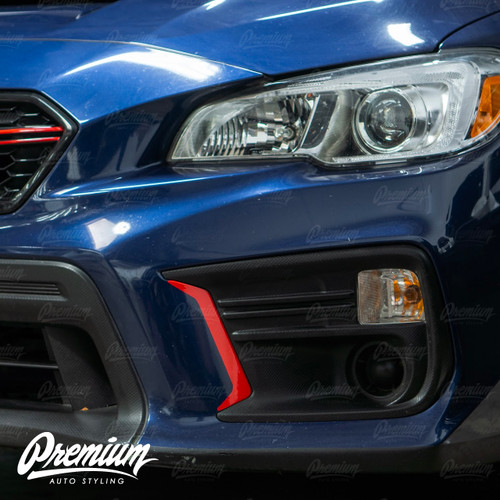
A simple way to change up the look of your front end on the Veloster is by installing this pre-cut automotive vinyl wrap overlay. Unlike most ebay or amazon vendors, Premium Auto Styling vinyl overlays are designed and produced here in the USA in our own facility. We design and test fit all products to ensure fitment guaranteeing you the best results . Basically, if they don’t work on our cars, they’re not going to end up on yours. If you are looking for an inexpensive styling modification, or you just want to change up the factory look, this is a very easy way to do it without needing professional help.
NOTE: This product has only been confirmed on the Veloster Turbo model, we cannot confirm if this product will fit the "Veloster N" front bumper as it is different from the rest.
TOOLS REQUIRED: PRO FELT SQUEEGEE, HEAT GUN OR SUNNY DAY FOR POST HEAT PROCESS
DRY INSTALL: For Best results we recommend cleaning the surface that you'll be applying our overlays too, cleaning should consist of removal of any waxes, dirt and or debris. For the cleaning process a clay bar is highly recommended: CLEANING PREP SPRAY & CLAY BAR's SOLD HERE). Before you begin installation of any vinyl overlays please make sure you are working in the right conditions, you should never install vinyl in direct sunlight, never apply vinyl in temperatures that are neither too hot nor too cold. Our in-house expert installers say the optimum temperature for installing vinyl is between 65 and 72 degrees (F). Vinyl can be installed in temperatures as low as 65 degrees (F), and up to 90 degrees (F). Vinyl has a more difficult time conforming and staying in place in colder temperatures though, which is why we recommend waiting until temperatures warm up or install in a temperature controlled environment.
NEXT after making sure your surface is clear of debris and any moisture, remember this is a dry install not a wet install. Start by centering the overlay to the bumper while it is still attached to the backing paper to give you an idea of where it needs to sit.
The overlay is precut so that it should fall right on the bottom edge of the grille. Remove the vinyl from the backing paper, holding both ends of the overlay place your two outer corners.
NOTE: Check to make sure you like your center placement by stepping away and seeing if you have centered it correctly. Also, placing to high will leave body color showing on the front edge of this section of the bumper.
After placing outer corners, lightly and carefully pick the center of the overlay up so that only the top corners are tacked into place, slowly guide the edge under the grille starting from one end to the other. The opposite corner you started on may have to be picked back up depending on how much of a shift you are giving the vinyl while feeding it under the grille.
Once accomplished use a squeegee and lay the top section of the overlay entirely before moving to the front edge. Using your finger slowly glide it along the top of the front edge this will begin guiding the vinyl down around the front face of the edge.
All that is left is to finish laying the material around the bottom edge, once completed, go back over the entire product with your squeegee to make sure there is no remaining air underneath the material. Finish by post heating the material with a heat gun or by leaving the vehicle outside on a warm sunny day for a couple of hours. This is done to finish the adhering process, and help conform any beveled edges. Once this is done your install is complete.
• Adhesive backed film for easy installation and removal.
• Maintenance free & car wash safe.
• Can be removed without any damage to surface.
• 3-5 year life expectancy.

MORE >> Difficulty Rating Information